
Bronze Mini Samurai Armor Statue — Master Build Process
Samurai armor is one of the most iconic protective armors used in battle throughout history, and is an iconic symbol of Japan, as well as of the warrior spirit. In this full step-by-step build process, we’ll reveal the assembly & painting of a Japanese model kit from start to finish. The final icing on the cake will be a final bronze coat of paint, which gives this model the effect of having been weathered by the elements throughout the ages. I personally love this effect, because it is super simple and can instantly give a luxurious, sophisticated appeal to any model, 3d print or art piece. Anyone can use the process I’ve perfected in this video to achieve dramatic effects in his or her own models. Some of the key fundamentals of model making are covered here, including gluing, collecting photo research, sanding, preparation and final paint application.
Materials used in this build:
-Resin Samurai model kit (www.aliexpress.com)
-PROkleber Hot Glue Gun (www.amazon.com)
-Rust-Oleum Automobile Primer (Light Gray)
-Rust-Oleum Universal Metallic Paint (Oil Rubbed Bronze)
-Testors Acrylic Enamel (Flat Brass)
1) This build starts off with an unassembled resin model kit. Even though this is a small 3” model, the kit had quite a few parts, each with an impressive amount of detail. Mold flashing will need to be trimmed off with an X-Acto knife before assembly:

2) The assembled model, bonded together with hot glue. I would usually apply a coat of automobile primer here, but opted to go straight to the rattle can paint instead. Paper is laid down to protect from paint overspray:

3) Below is a collection of real-world bronze weathering reference imagery, which I took from a trip to Disneyland. There’s nothing like studying from real-life reference, sine this will give this model an air of ultra-realistic authenticity. This reference will be critical to get the realistic bronze effects just right:

4) The first base paint coat of Rust-Oleum Metallic Oil Rubbed Bronze is applied in three light to medium coats, a few minutes apart. A few minutes later, the final layer of paint is applied. The base of the model is rotated to reach all angles evenly, since you NEVER want to touch a model while it is still wet:
5) After allowing the paint enough time to dry to touch, the underside of the model is sprayed and left to dry on a makeshift drying rack (T.P. rolls). This layer is given a few hours to dry before moving onto the next step:

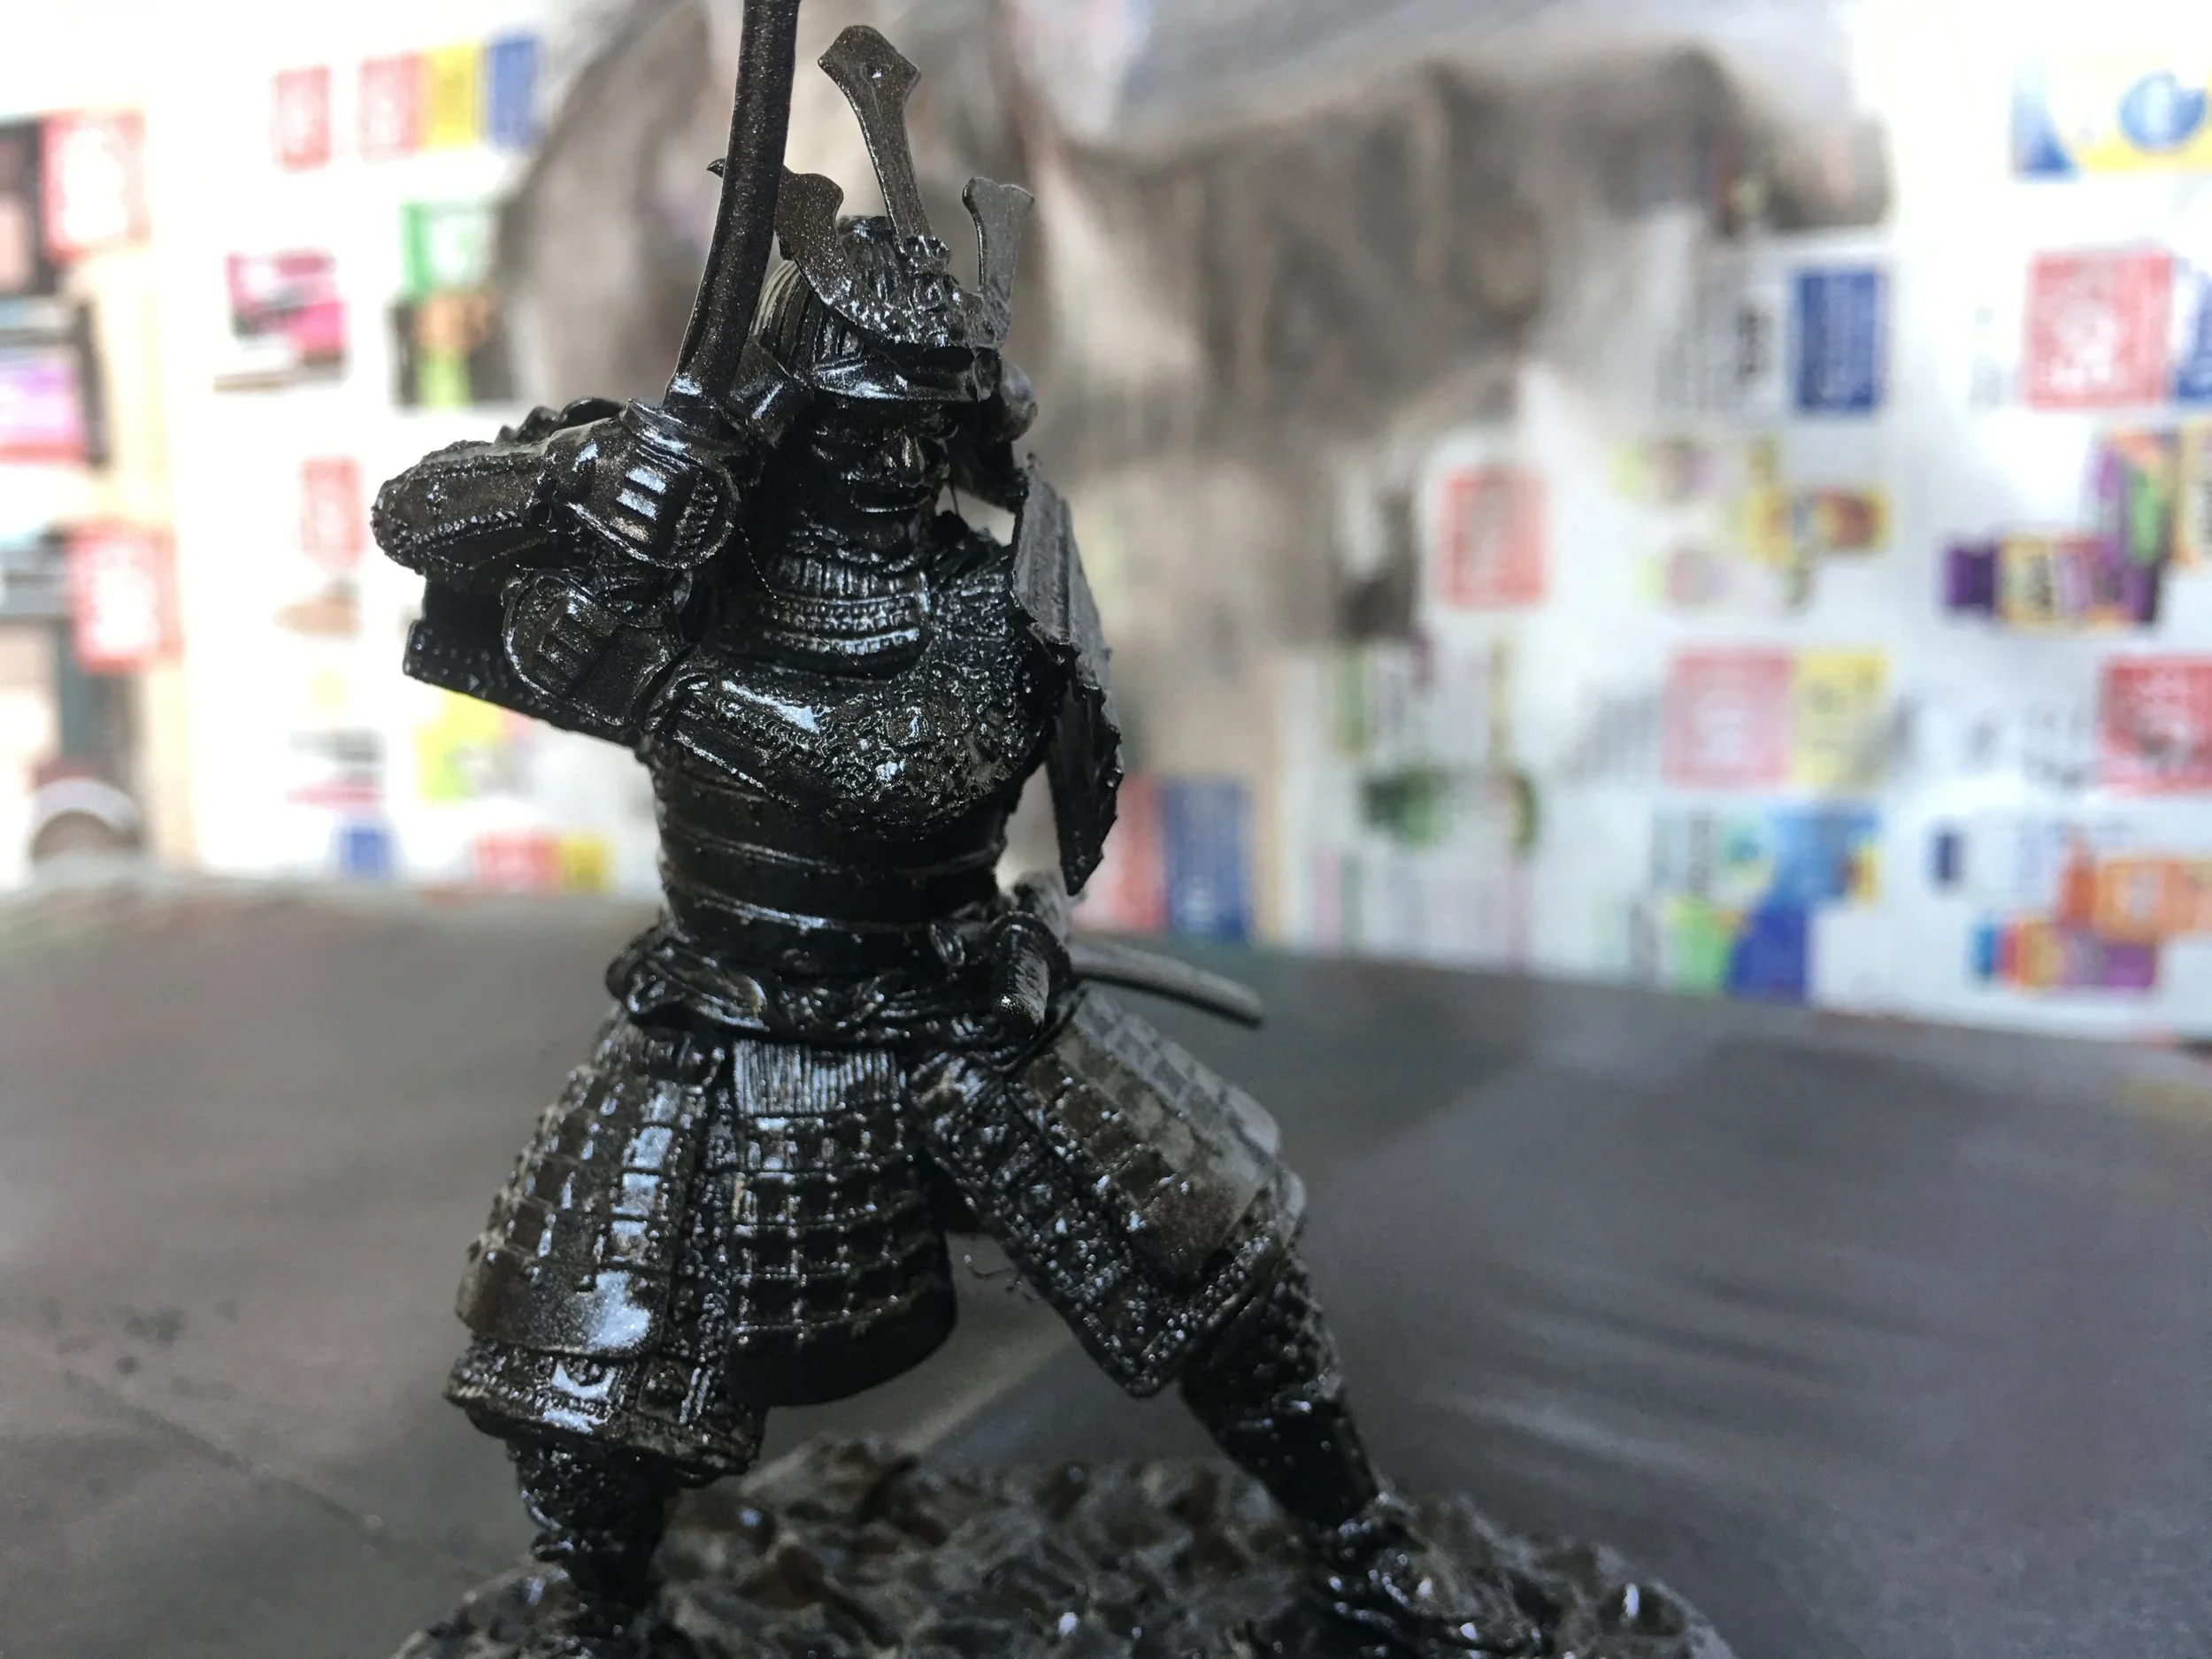
6) The base paint layer after allowing to dry upside down for a few hours — now ready for bronze highlights:
7) As a final paint application, I use Testors Flat Brass color acrylic enamel paint, lighting dabbed on with a paper towel. A Q-Tip is then used to paint in all of the hard to reach crevices. Like the bronze statue reference from Disneyland, the brass effects are only applied to areas that are facing up to the sky — which would likely be touched by tourists or passers by, which would give this sort of weathered effect. A little bit of the brass highlights goes a long way here, so be careful not to do overdo it:

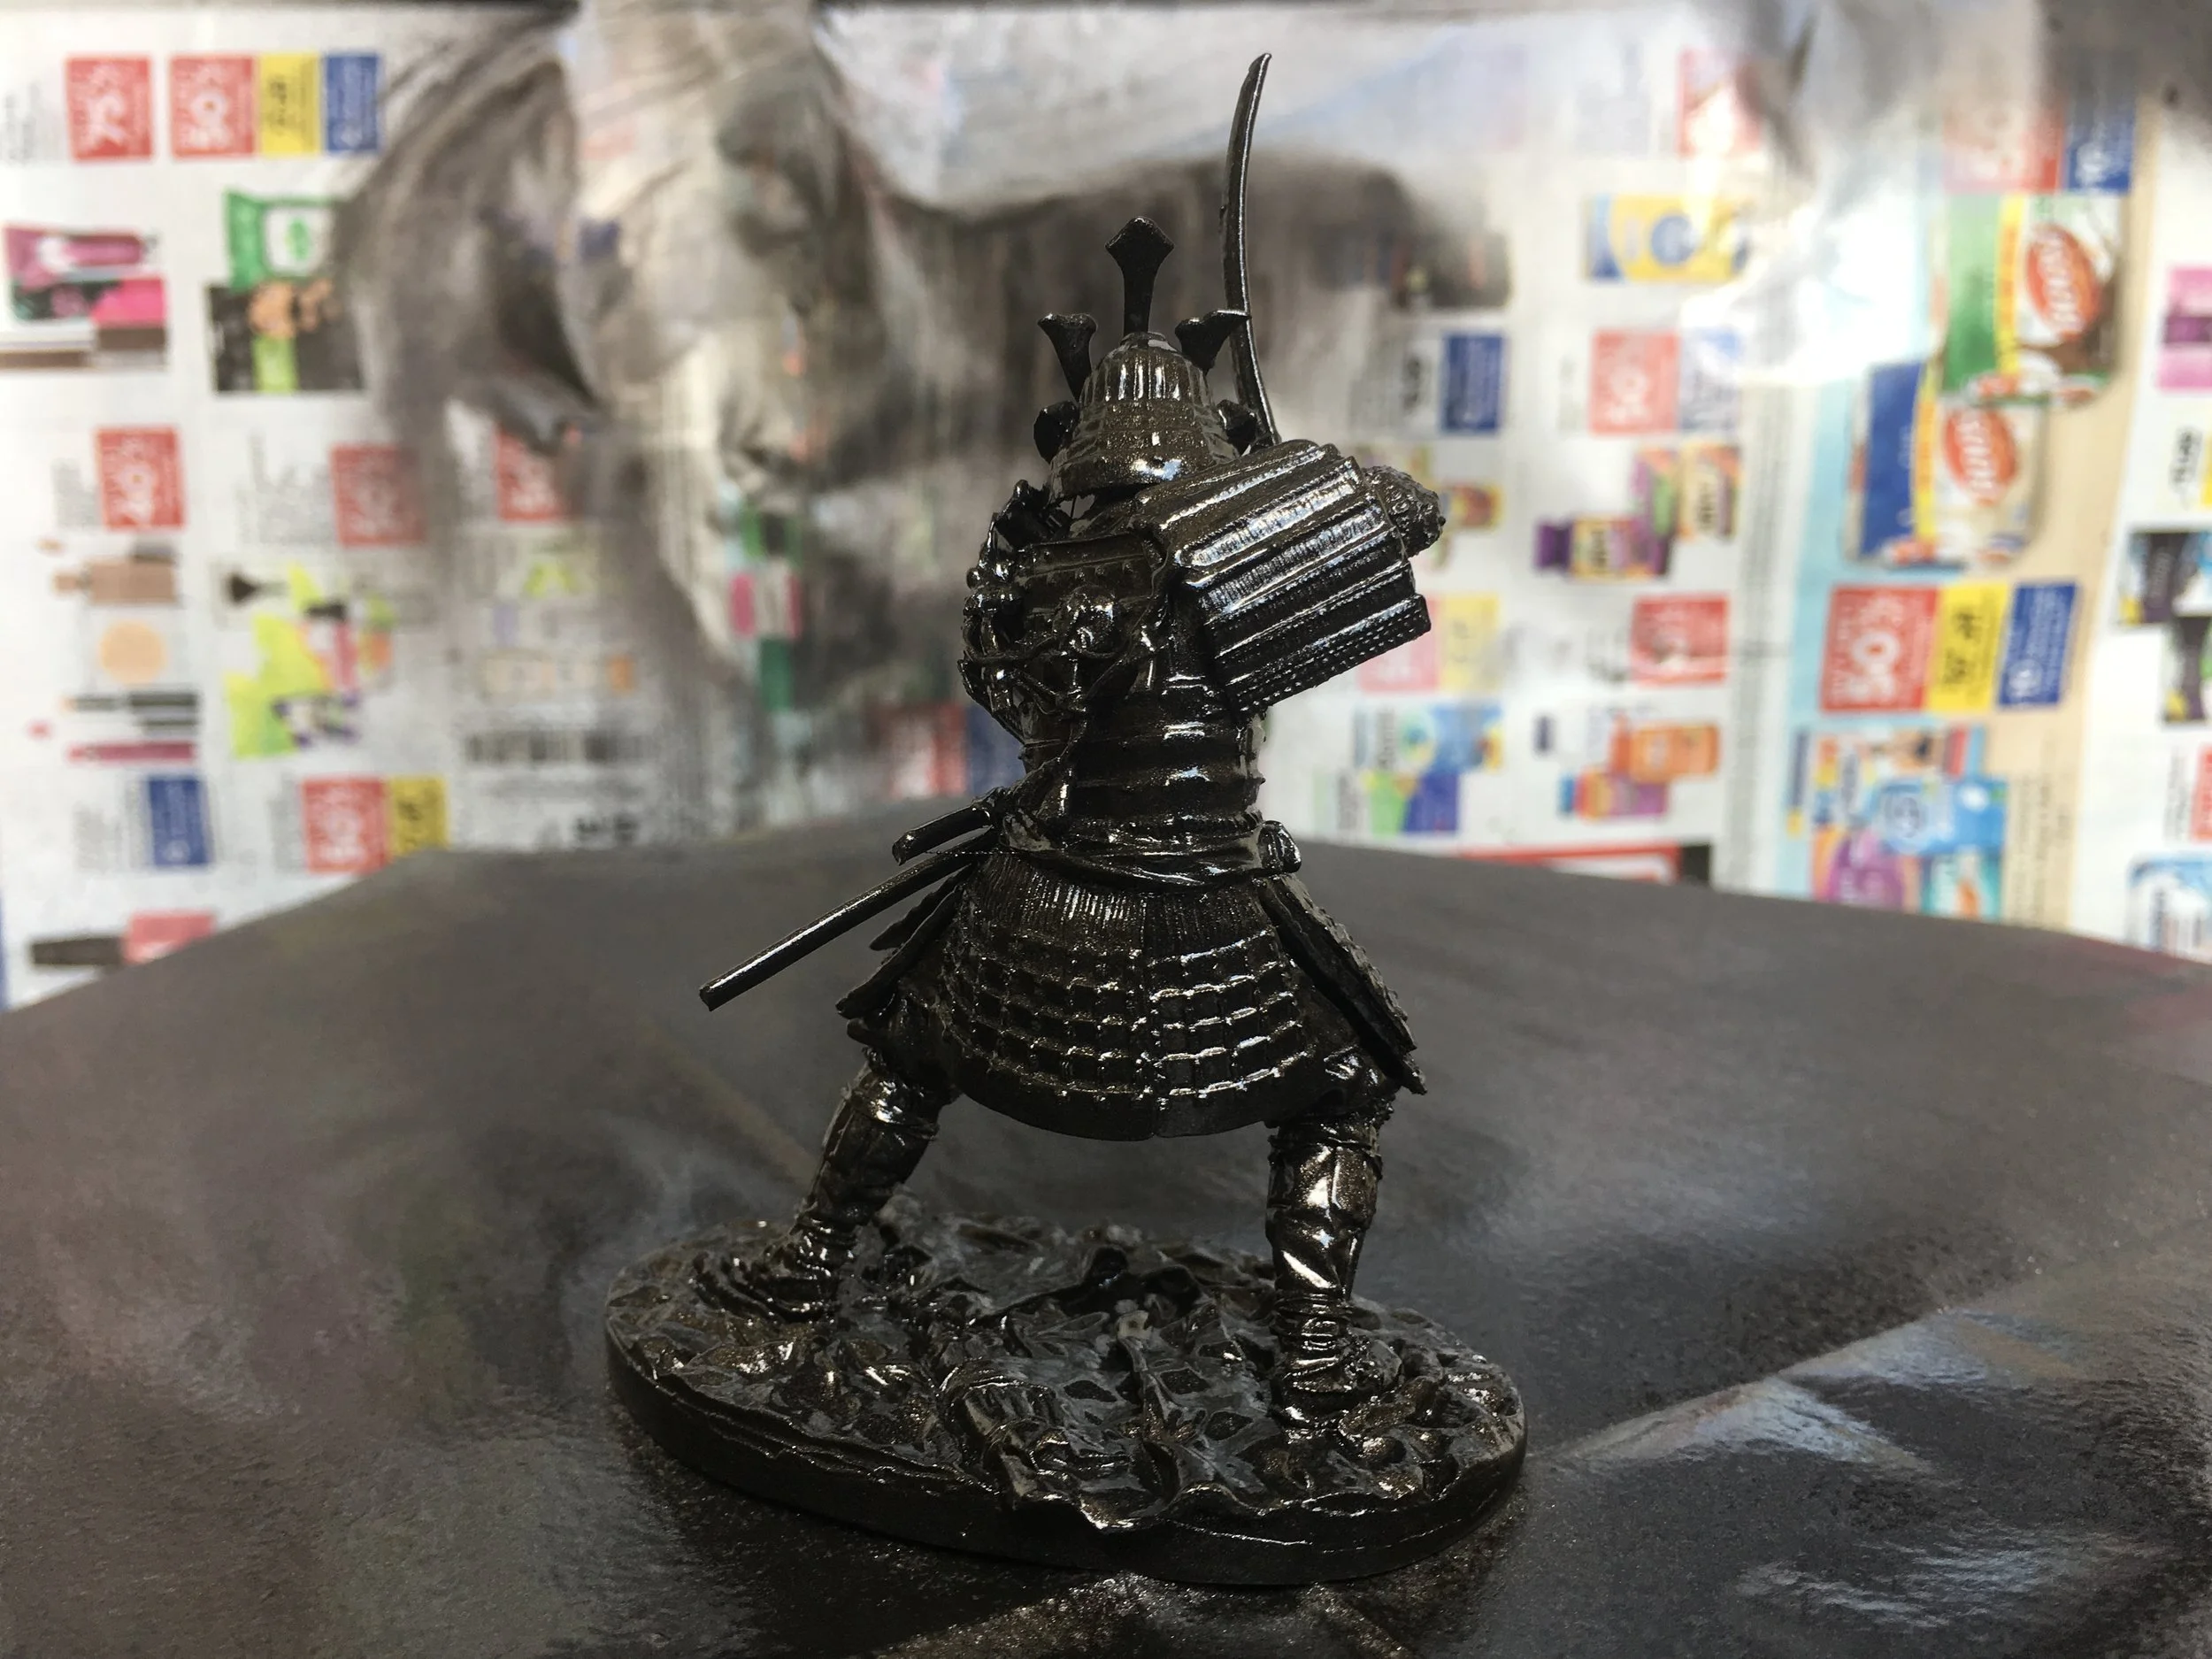
8) And Voilà — the 3” statue now has the incredible look of a life-sized samurai statue, which has been sitting in an ancient courtyard for hundreds of years. Shout out to DD Hobby for the spectacular level of detail on the casting of this kit — this was a super fun build!
-Chris


Take your Maker game to the next level with The Maker's Field Guide: Master Maker Edition!
More step-by-step pro builds like this one can be found in the all new Master Maker edition of The Maker's Field Guide — available now as both a book & ebook in the online store. Take your maker game to the next level and become a true design, model making, and fabrication Samurai warrior!